


Marimo, a Japanese word which literally translates to “seaweed ball” are not moss at all - they’re actually a rare form of spherical algae. There’s no central stone or kernel inside the sphere - it’s solid algae, radiating from the center, growing radially outward at the snail’s pace of just 5mm per year. But in their natural habitats - few fresh water lakes in Japan, Estonia, Iceland, Scotland and Australia - they’ve been known to grow to between 8 and 12 inches in diameter.
Another reason to love Marimo moss balls is beautiful lore that surround these mysterious aquatics. Legend tells of two lovers who desired nothing more than to be together. When their love was forbidden, they fell into the water, and their hearts became Marimo balls. Marimo are said to bring your heart’s desire to both giver and receiver.
And of course, we love Marimo because they live for such a long time- with correct conditions they can live for 100+ years. For this reason, we often say that Marimo make wonderful family heirlooms.
Marimo moss ball care is quite simple. Here are a few guidelines.
Light
Keep your Marimo where they will receive low to medium indirect light. You must protect marimo from the direct rays of the sun, as Marimo can easily turn brown if they are getting direct light. Also keep in mind that direct sun will be intensified by glass marimo enclosures which can heat water quite quickly. Remember - these guys are native to cool lakes, and should be kept cool.
Marimo are well adapted to low light spaces and can photosynthesize in normal household light. If your space has no window, keep marimo close to a fluorescent or full-spectrum bulb.
Changing the Water
Change water once every two weeks using regular tap water. For best results, allow water to sit out for 24 hours prior to changing the water. You’ll need to change the water more often in summer, as it will heat evaporate more quickly. Clean your marimo enclosure with a brush if algae begins to grow on the tanks glass surface. From experience I’ve found that If you have a glass jar with a lid you dont have to change the water as often.
Browning
If your marimo turn brown, make sure they’re moved to a cooler location with less direct light. They may recover and turn green again on their own. If not, you may add a tiny amount of aquarium ocean salt.
Why are my Marimo Balls Floating?
More than likely, your Marimo balls have an air bubble trapped inside that is causing them to float. Gently squeeze your marimo balls to pop the air bubble. Generally, Marimo will sink to the bottom of their tank within 1-2 days of being added to an enclosure.
Keeping Marimo Shape Round
In their natural habitats, the waves and currents of the lakes gently rotate and roll the Marimo balls along the floor of the lake.
To ensure that Marimo keep their round form and don’t flatten out, you’ll want to gently agitate the water in your Marimo enclosure, with the goal that when your Marimo balls settle back to the bottom, they rest on a different side than they had prior. Try to simulate the gentle waves of a lake.
Enjoy your new pets! Look after each other x

Care Information
Each piece is unique, colours will vary between batches, and will contain small air bubbles that are part of the design.

Each piece is hand poured and has its own glorious imperfections this just serves to contribute to the unique character of the piece.
Currently available in two sizes.
These plant pots are treated with a water resistant sealant, but small cracks may appear if they have water sat in them. As concrete is a porous material- ideally select plants that need less water such as cacti and succulents.

The planters have felt pads underneath to protect worktops and your furniture.
They are intended for indoor use only.
The plants you chose to sit in the cement pots should be kept in their plastic nursery pots inside.
These pieces are not food safe.

Thank you for your purchase. I love a great plant pot and these really finish off the look to the plants wearing them. Shop the range available here.
Closed terrarium kit from Stem&Co
A terrarium is a collection of small, decorative plants growing in an enclosed environment. Terrarium containers are typically transparent and provide an opening big enough to allow the gardener to access the plants inside. The best part about a DIY terrarium is that you get to create something one-of-a-kind.
A closed terrarium is essentially a miniature landscape with its own rain cycle. Compared to open terrariums and dish gardens, your closed terrariums require minimal effort to maintain once they’ve been planted.
We’ve got you covered with everything you need to know about how to make a terrarium.
Container. The terrarium vessel included in your kit is secured for its ideal size and is made of clear glass to allow enough light for plants to thrive. You should also clean your container with soapy water and allow it to air dry before planting.
Terrarium tools. You can purchase terrarium tools or simply use items you have lying around the house. A long-handled spoon can be used as a substitute for a shovel. A cork attached to a chopstick can be used to pack down soil after planting. You can use clean sharp scissors for cutting damaged or yellow leaves.
Planting your terrarium
First step
Add Small Stones or Pebbles drainage layer first – Small stones or pebbles will be used as the base of your terrarium. The small pebbles act as water drainage for the plants roots to ensure that excess water doesn’t stay in the soil and cause rot. You may not need to add all of the provided drainage layer- ensure the level is no more than a fifth of the overall height of the vessel to make sure you have room for the soil and plants with room for the plants to live in.
Step two
Then add the Activated Charcoal – You won’t need much; a thin layer of activated charcoal keeps water fresh and helps to fight off bacterial growth in your terrarium.
Step three
Potting Soil – Potting soil will act as an important layer for your DIY terrarium. Your terrariums requires a potting mix with low fertility. It’s also got a mix of additional charcoal to add organic matter and absorb any chemicals or odors. You’ll need enough potting mix to fill your terrarium to the depth of the largest rootball of the plants you are adding into your terrarium. When you prepare for planting the soil should be damp, but not soaking wet.
Step four
Creating a design. You can choose to display only a single plant or many. If you included multiple plants in your terrarium but don’t overcrowd your design. Decide how your terrarium will be viewed — from all angles or from the front. If it’s only going to be viewed from the front, plant the tallest plant in the back and the smaller species in the front. If your terrarium is going to be viewed from all angles, the tallest plant should go in the center with the smaller plants blended around it. Consider your design before planting. It’s harder to change the design within the confined space of the terrarium.
Planting your terrarium. Make sure the soil is damp and start with the smallest plants first, leaving space for the larger plants as you go. Once everything is planted, clean off any dirty leaves and glass inside your terrarium with a clean, soft brush or paper towel.
Step five
Included within your kit is a variety of added extras, I’ve gathered and collected an amount of found seashells and wood items from our local beach. I’ve also added in some lovey grey slate. Insert these amongst your little plants to add interest and personality. These will add to your individual mini scapes. You can even go gather your own to make a really personal landscape. Make sure anything you add that you’ve collected has been sterilised and cleaned especially if found on the beach- boiling water will help. Don’t add anything made of metal.
Top tips
Avoiding pests and diseases. The humid enclosed environment inside a closed terrariums are perfect breeding grounds for pests and diseases. You should wash your hands or wear clean gloves before preparing and planting your terrarium. Additionally, if you notice any damaged or yellow leaves on your plants, remove them before planting.
Water. You’ll need to water your newly planted terrarium, but be careful not to over-water it. Misting you plants is one way to avoid over-watering. You can always add more water later, which is easier than trying to remove excess water. If there’s water on the foliage of your plants, leave the lid of your terrarium until it dries. Once lidded your terrarium should establish a rain cycle. Never use tap water. Dechlorinated or rain water is ideal.
You’ll notice condensation on the inside of the container, which rolls down to water your plants. The condensation should look like a light fog. Anything heavier is a sign you should remove the lid for a day or two to let it dry out some. Once the rain cycle has been established, your closed terrarium is almost maintenance-free.
Choosing a location. Now that your terrarium has been planted and is starting to become established, you’ll need to choose a permanent location for it. Bright rooms or near bright windows are preferred locations for most terrariums; however, many terrarium plants do well in dimmer rooms. If you determine your location beforehand, choose plants that can survive in the light offered in that location. If you choose your plants first, select a location that can accommodate the light requirements of your plants.
Maintenance
Removing the lid. Remove your terrariums lid once a week for up to 15 minutes to let in fresh air. This will also allow you to vent your vessel from any built up pressure from inside.
Watch for diseases. Because the environments inside closed terrariums are perfect breeding grounds for diseases, your terrarium can be devastated quickly if they’re not caught early. Check you terrarium a couple times a week and treat it with a diluted fungicide as soon as you notice infection.
Water. Only add water if you notice condensation has stopped, the plants start to droop, or the soil feels dry. If your container has a tight lid, this is only necessary every four to six months.
Suitable plants. If you ever select additional plants to include into your design you should choose small, slow-growing or dwarf plants that fit into your container with room to spare. Moss, lichen and ferns are ideal for closed terrariums because of their ability to survive in dim, moist environments. Choose healthy plants with similar light and moisture requirements.
Rotate the container. If you notice your plants growing towards the light source, rotate your container to even them out.
Pruning. Prune plants when they are yellowing, touching the glass or getting too large.
Fertiliser. Once a year you may want to fertilize with an organic water-soluble fertiliser at 1/4 the recommended rate. Spring is an ideal time to fertilise. Never fertilise during winter.
Stay in touch!
Tag me in any photos you post online Id love to see what you have created.
Peace Lily Care
The first thing that Peace Lily owners usually notice about their care is that they wilt pathetically if allowed to get the least bit too dry. This wilting can occur quickly and will result in the leaves sagging over the rim of the pot. Surprisingly, a badly wilted Peace Lily will recover just as quickly and dramatically once it is watered.
LIGHT: In their native habitat, Peace Lilies grow on the floor of the rainforest where the light is deep shade. Thus, Peace Lilies do not tolerate direct sunlight well at all. When exposed to direct sunrays, the leaves will turn a pale sickly green and sometimes brown. The best light is bright indirect light. That would be as close to a window as possible but just beyond the reach of the sun's direct rays.
WATER: Ideally, you will water your Peace Lily just before it starts to wilt. With a healthy new Peace Lily, that occurs when the surface of the soil still feels slightly damp. With older or newly repotted Peace Lilies the top half-inch or so of soil may need to dry before it reaches the wilt-point and needs water. It is the failure to recognise this change that an aging Peace Lily makes that most often leads to their demise because they are watered too often.
Once the soil has become very dry, it is sometimes hard to rewet the soil. If this happens, allow the pot to sit in several inches of water for an hour so that it can wick up the water and become completely saturated. Then wait until the plant just begins to wilt a bit before watering thoroughly once again.
HINT: Every couple of months let your Peace Lily start to wilt. This will tell you how long it can go or how dry it can get before it really needs water.
WATER QUALITY AND FERTILISER: Peace Lilies are sensitive to the buildup of certain minerals in the soil. If your local tap water is on the hard side, then use filtered, distilled, or rainwater for your plants. It is also important not to overdo the fertiliser (another source of minerals) as too much can damage the delicate roots. Our Seaweed plant feed is an ideal fertiliser for your Peace Lily.

Fertilise only when your Peace Lily is growing vigorously. Mix it at half strength and apply it monthly. Any balanced fertiliser is fine, but one with a higher middle number (5-10-5, for example) will help promote flowers a bit more than other formulations.
REPOTTING: Peace Lilies are more inclined to produce flowers when they are potbound. Moving your Peace Lily into a larger pot will discourage flower production and, worse, may lead to root suffocation. It is best not to repot, if at all possible. If your Peace Lily dries to the wilt-point every 2 or 3 days, then it might be ready for a pot one size larger. Otherwise, leave it in its existing pot.
TEMPERATURE: Peace Lilies don’t like temperatures below 60 degrees. Normal home temperatures are fine.
TRIMMING: Leaf tips and edges will turn yellow and brown for many different reasons including improper water, too much light, poor water quality, and too much fertiliser. Try to determine the cause and eliminate it to prevent further damage to the leaves.
Discoloured leaf edges and tips will not recover. Use sharp scissors to trim the discoloured leaf margins and tips. Cut so that the original contour or shape of the leaf is maintained, i.e., so that it does not look obviously cut. In some instances, it may be better to remove the entire leaf. Sterilise a shar pair of scissors with boiling water first before cutting.
PROPAGATION BY DIVIDING: Typically there are multiple Peace Lily stems growing out of the soil. These multiple stems help support one another and create a more compact, fuller-looking plant. In general, it is best to leave these multiple stems together in the same pot. Attempting to divide the plants will damage many of the fine root hairs and may permanently stress the plant.
FLOWERING: Why don’t my Peace Lilies bloom any more? This is a common question with many explanations. Most Peace Lilies sold today are hybrids that have often been genetically selected to produce very large leaves or a darker green color or variegated leaves. This is often done at the expense of continued flower production. Many hybrids are timed to produce a large burst of flowers at point-of-sale, but then only flower sporadically thereafter. Unfortunately, there is nothing you can do to alter the genetic makeup of your plant. Peace Lily blooms last one to three weeks, depending on the environment.
That said, there are several things that you can do to promote flowers within these genetic limitations:
• Provide bright indirect light rather than low light.
• Keep your Peace Lily potbound
• Fertilize monthly at half strength
If that doesn’t work, then enjoy your Peace Lily as the lovely foliage plant that it is.
GREEN FLOWERS: Sometimes new flowers emerge and are green rather than white. It's all in the genes and there is nothing you can do about it. Nearly all Peace Lilies sold today are hybrids that are "designed" to produce a flourish of white flowers at point-of-sale. After that, the flowering tends to be more sporadic and the flowers often revert to green.
DISCOLORATION OF LEAVES: Brown and yellow spots on the edges of leaves are very common with Peace Lilies and sometimes hard to eliminate. Unfortunately, there are numerous causes of these symptoms, including natural aging. If these symptoms are appearing on only a few of the older (lower) leaves, then it is just natural aging as healthy new leaves replace the older leaves. If it is more extensive than that, then it may be caused by improper light or watering or using hard water.
These symptoms are rarely a sign of disease or poor plant health. However, if newly formed leaves are discolored, then that is more serious and usually is a symptom of root suffocation due to overwatering. Often, it is too late by the time this particular symptom appears.
HUMIDITY: Low humidity is not the cause of leaf spotting on Peace Lilies. Many times people don't realise that plants need more water when the humidity is low because of increased evaporation. If the roots get too dry, especially if the soil is over-fertilised, brown spots will appear on the leaves as a result of the underwatering, not the low humidity.
LONGEVITY: Peace Lilies do have a tendency to decline as they age. They are not a particularly long-lived indoor plant although this can vary with particular varieties and overall care. When it comes to frequent flowers and a long life, keep your expectations low with your Peace Lily.
We guarantee our bouquets for 5 days from the day of purchase.
Here are 5 easy ways to assist your cut flower blooms so that you can enjoy them for as much time as is possible and get the most of out of them. Most of these tips you will only need to do once or once every two or three days and only take a minute.

1. WATER AS SOON AS POSSIBLE
This is pretty well known, but cut flowers need to get in water as soon as possible after you purchase them. You can get them in water and then arrange, trim, or cut them as needed later in the day when you can take the time for them.
2. KEEP THE STEM CLEAN
Every two to three days, you will want to make a fresh trim at the bottom of the stem preferably at an angle so that the flowers will have a fresh cut to suck up the water. Additionally, before putting the flowers in the water, you will want to remove any of the leaves or foliage on the stems that will be submerged in water. This will help prevent bacteria from breeding and keep the water cleaner for longer.

3. KEEP THE FLOWERS OUT OF THE SUN
Contrary to what you might think, cut flowers prefer a cool, dark spot out of the way of a draft, unlike their garden counterparts. The sun will dehydrate flowers faster. Place flowers away from windows where the sun will directly shine on them, and out of the way of any air conditioning units and radiators.
4. CHANGE THE WATER EVERY 2 – 3 DAYS
Replace cloudy and dirty water with fresh water every 2 to 3 days as needed to lengthen the life of your flowers. This will prevent bacteria from breeding and clogging up the cuts that the flowers are using to provide themselves with water.
Most vessels used to contain the flowers are glass vases- glass is the best material as it is easier to keep clean and bacteria at bay than say plastic.

5. FEED YOUR FLOWERS
Make your own cut flower food. Simply mix 1 litre of water + 2 tbsp lemon juice + 1 tbsp sugar + 1/2 tsp bleach for a homemade flower food and water solution.
To elongate the life of your cut flowers we have invented our very own flower food in the form of a spray. We have called it Posy Potion: Simply spray lightly onto the foliage and flowers to extend their life and retain their colours for longer. One bottle of Posy Potion goes a long way there’s no need to drench them. A light spray will do nicely. It acts as an Anti-transpirant and stops water evaporating allows the stems to retain water for longer.
It is an all-natural, organic, biodegradable, and non-hazardous solution.
This Anti-transpirant made from pine resin is a natural compound applied to plant leaves to reduce transpiration of moisture.

Although we recommend spraying them outside or in a similarly safe location to prevent the solution from getting on unintended surfaces (e.g. counters, tables, walls).
The packaging looks great too so apart from being a vital tool it will look great on display along side your arrangement.

As always, thank you for reading and we hope that this inspires you to bring some nature into your home through flowers.
The perfect plant collection.
Most of us appreciate and strive for perfection but understand that it is rarely achievable.
If I study my face in the mirror I have a scar running from my top lip. I have uneven eyes where one appears bigger than the other when I smile. Sometimes my glasses sit lopsided on my ears and the bridge of my nose bears the striking kink in it that some of my dear family have that has passed down the generations. I accept these flaws and blemishes.
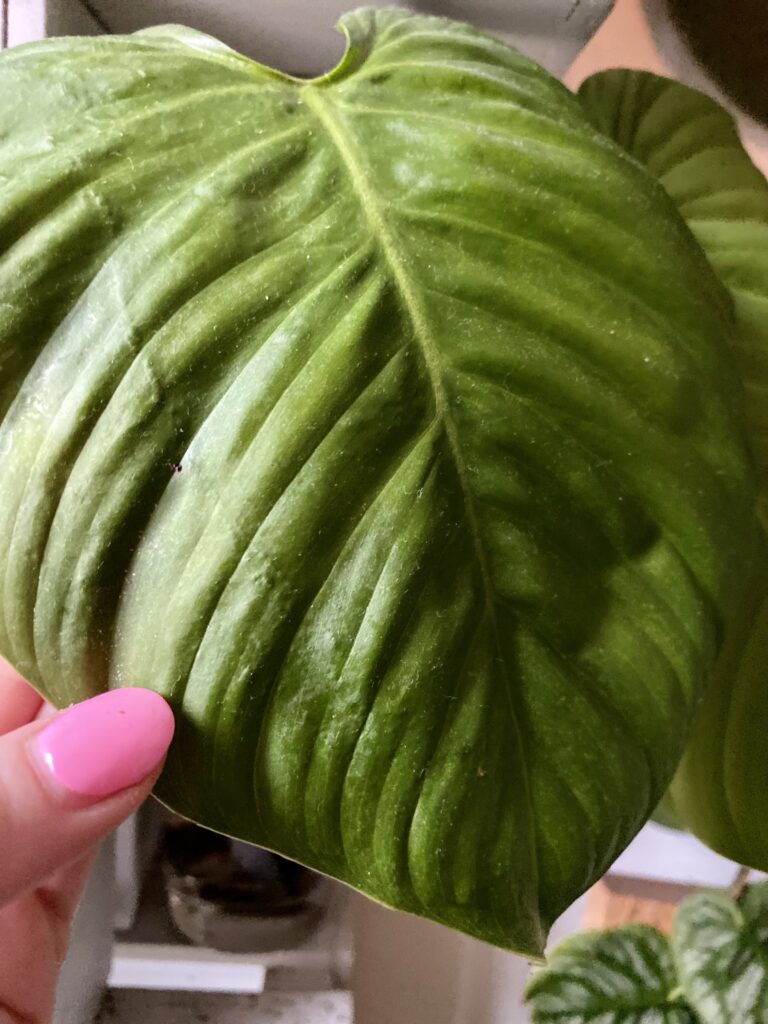
Sometimes we expect too much from our houseplants, wanting them to stay as nearly perfect as the day we bought them. Most houseplants sold commercially are grown by specialist growers in greenhouses where they carefully control light, temperature, humidity, where they are fed with nutrients and plant feeds, and also watered to perfection. But when those plants are brought and taken home which are not those exact greenhouse grown environments so our houseplants are bound to develop some imperfections.
Even when your house plants are cared for as perfectly as possible, where you’ve researched the plant species and it’s requirements, you own grow lights and good plant feeds and plant care products they will still not be ‘perfect’. Like all living things, they develop imperfections and they don’t live forever. Minor leaf blemishes and discolorations are normal, expected, and best ignored. Older leaves will gradually die back as they age.
If you want to have houseplants don't expect them to be perfect and try not to overreact to common plant imperfections.
Accept what you cannot control and enjoy what you can accomplish with your houseplants. Expect and embrace the imperfections and focus on all of the positive aspects of how much your plants have flourished under your care and don’t focus on slight leaf blemishes.
The photos that illustrate this article are taken from my own private plant collection. I certainly have scars, rips and tears especially in plants that have bigger leaves as they become really noticeable on these. I have scarred plants that are recovering from pest infestations and plants that have spotting due to under or over watering, until I got used to the each plants needs then these marks are the tell tale signs that I learnt along the way in my plant collection. Can you relate?

I often find I’ve got pockets full an unidentified collection of leaves from walking round pinching off the old leaves here and there that die back. Try not to worry when this happens, your plant is acting as it should by giving way old leaves to allow for the new growth to come through.

The plants I’ve collected, care for and adore are far from ‘perfect’ but bring me so much joy. I hope that the aim of this article has helped you embrace your imperfections too.
Calatheas, Marantas & Ctenanthe.
These are popular plants because of their interesting colours and variegation. Prayer plants are plants that belong to the Marantaceae family, which includes, amongst others, the Maranta, Calathea, and Ctenanthe plants. These are all different types of plant species but are closely related and require mostly similar care.

These plants are called prayer plants because of the way the leaves open during the day, and, as a response to changes in sunlight, fold up at night like praying hands.
This is normal behavior for these plants, so calathea leaves moving is nothing to be concerned about. The movement is more noticeable with with some varieties of Calathea you are lucky, you might even hear the leaves rustle when they move and rub their leaves against each other.
The moving of the leaves in this manner is called nyctinasty. The general purpose of the movement of foliage with all plants is to capture the light. During the day, Calathea leaves drop and assume a more horizontal position to get more light. The green part of the leaf will be facing the source of light.
They are not difficult to care for but I find that hybrid varieties of Calatheas can be less tolerant of living in our homes with us. There is a downside to many new hybrid plants. One is that they often are not as vigorous or hardy because their visual qualities have been emphasised at the expense of hardiness. Hybrid Caltheas that I’ve personally struggled to keep happy has been White Fusion and Lemon and Lime and even Misto.

As with most of your house plants, Calatheas do best when their roots are left undisturbed. Check each spring if they do indeed need repotting, I recommend Soil Ninja Calathea premium soil blend which we now stock. It contains all that the plant requires to flourish. They won’t require repotting often, if you do decide to repot then only go one plant pot size bigger each time so the soil to root ratio does not become unbalanced. Too damp soil can rot roots.
Also like many house plants, they do best in bright but indirect light. That means as close to any window as possible, but just beyond the reach of the sun’s direct rays. Either too much or too little light will cause their colors to fade.
Keep room temperatures above 15 degrees C. at all times. Never leave a Calathea too close to a window if the leaves rest against the cold glass you can lose the plant very quickly.
These plants prefer a higher humidity so a plug in humidifier is a good investment. Only use distilled water to avoid furling up the nozzle.
Let the top half-inch of soil get dry to your finger probe and then water thoroughly until some water trickles through the drain holes. Underwatering is a more common problem than overwatering so if in doubt, it is usually better to water sooner rather than later. The brown leaf edges and tips commonly attributed to low humidity are usually caused by the soil getting too dry. The brown leaf tips can also be an indicator to tap water use.

If your tap water is hard, then use distilled, filtered, or rainwater instead. Calatheas are more sensitive than most to the excess mineral salts in hard water. Another option available to you is investing in a bottle of Taptonic. Our newly launched product to join our plant care range. It removes chlorine and chloramine from tap water making it safe to use.
As Caltheas get older, their stems tend to spread sideways over the edge of their pots. This is their natural growth habit and not a sign of distress. The stems can be left to grow longer or they can be pruned back to any length without harming the plant.

For the last year I have been running a Pop Up Shop situated inside the quaint little pub in the heart of Cleethorpes. Found on Cambridge Street in the popular Seaview Street Quarter, People Bar, 20 Cambridge Street Cleethorpes has been my working home for the last year.

I first popped up at People Bar in October 2021 in time to start the Autumn season so we filled the street with our popular Hydrangea Wreaths. This time of year provides florists with an abundance of colour and textures to play with. I set out the front of the shop each day with an array of fresh flower hand ties that included Rosehips and dried seed pods and made a selection of fresh wreaths each week to hang on front doors.
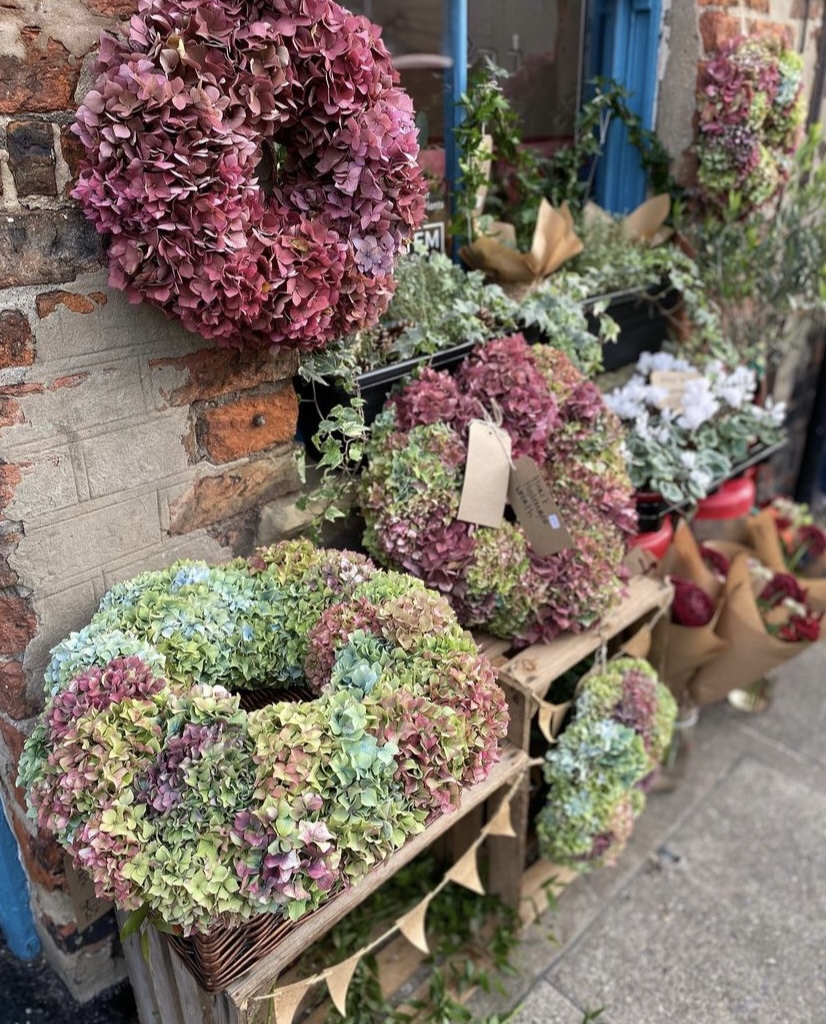
Getting ready for Christmas starts off the winter season. I returned to offering Christmas Wreath workshops and filled People Bar with vibrant door wreaths, plant related gifts and also opened longer hours for those needing Christmas shopping time. Seeing as we are housed in a bar a vat of mulled wine was served to the shoppers and workshop goers. The friendly and cosy surroundings truly made me feel like I was home.

Im here for you! Once the Christmas decorations come down my houseplant owners, enthusiasts and valued customers return for fresh green plants to share their homes with once the Christmas tree is taken away and the decorations come down. The seasons of Spring and Summer always seem to then move fast, probably because a florist works faster in these months when wedding work clusters around the warmer days with longer day light hours. My cycle of houseplant stock demanded more attention with keeping up with care, watering and feeding as they wake from their dormant quiet winter months.
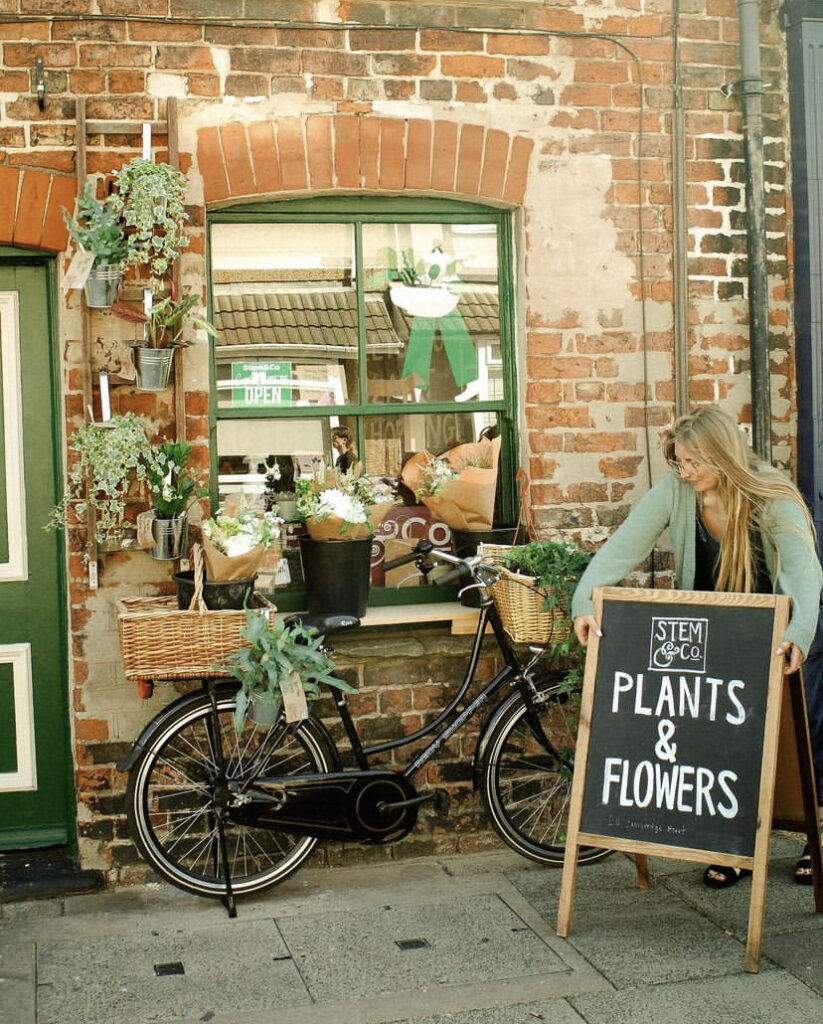
This year saw me trading both in plants and fresh flowers. With lots of customers buying dried flowers too enabled me to build up an exciting array of stock. Our dried flower bouquets and arrangements consist of earthy tones and splashes of muted pinks. They are currently very popular and available in the shop and online.

A treat each week is to make up fresh hand ties following the colour palette for each season. I’ve been keen to use seasonal stock that has less air miles where possible.

A huge thank you goes out to Brett and his team that run People Bar alongside other local pubs and eatery hot spots, all well known in the area. Their kindness and hospitality has allowed me to take Stem&Co on a beautiful year long journey and has allowed me time to build and push my business into exciting new directions. He has been like a business big brother and from this support I’ve launched a new range of plant care products born from my time and experience of tending to houseplants. I truly beleive Brett has allowed me time to feel creative and push into a new plant related avenues and for this I am truly thankful. Find out all that they do by visiting their website Slipway Group. In fact treat yourself and book a table at Folk and sample a Bottomless Brunch and don’t forget to order their infamous Scotch Eggs!

If you are reading this and live out of the area and fancy a trip to the seaside then please come visit! There’s so much to do in Cleethorpes. Here’s an article recently featured in Coast Magazine about just that. Its a great article to read and contains ideas of where to go and what to see in our area- from plant shopping in my cute little plant shop to Stand Up Paddle Boarding.

Made In Grimsby has created a great directory of local businesses and things to do in our area. I’d always recommend this website for up to date local information.
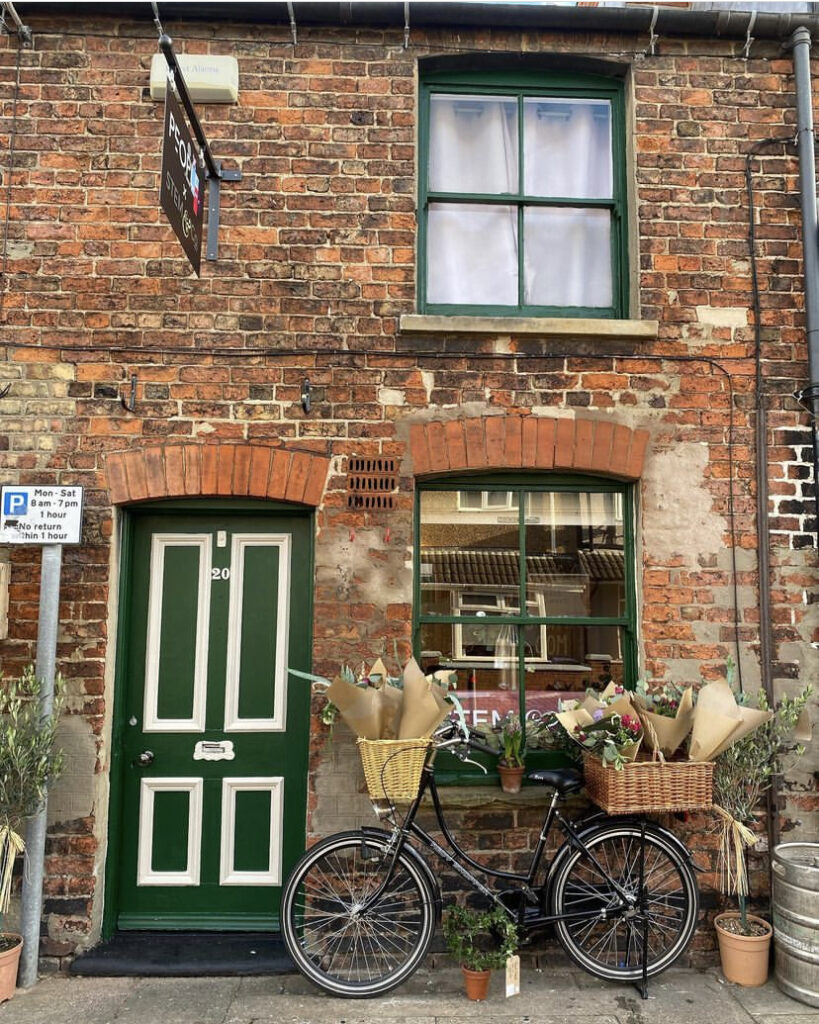
My current opening times are Tuesday, Wednesday and Thursdays 10-4pm. We are also running workshops throughout the year if you fancy joining in. A new category has been added onto the website to easily find the dates and details for booking yourself on.
